Hanging artwork gallery-style is one of those things that feels intimidating until you break it down. There’s often a fear of getting it wrong, putting holes in the wall in the wrong place, or ending up with something that feels messy rather than curated.
The good news? There is a simple, repeatable process — and it’s the same one I use in my own home and for clients. Here’s how to do it, step by step.
Step 1: Collect your artwork
Before you think about walls or nails, gather everything you may want to include.
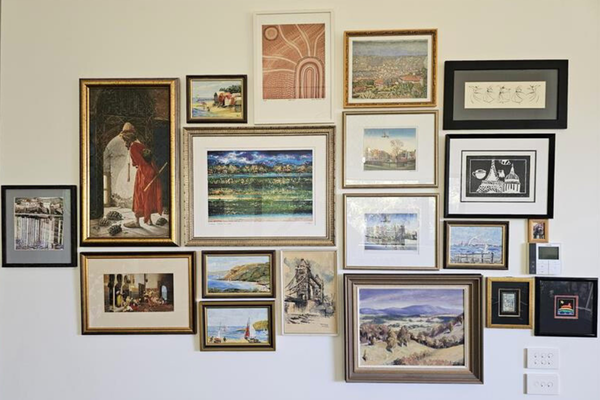
- Frames – these can be the same size or same style, or not match at all. What you choose depends on your own style. For me – I liked frames that are a mix of colours and styles.
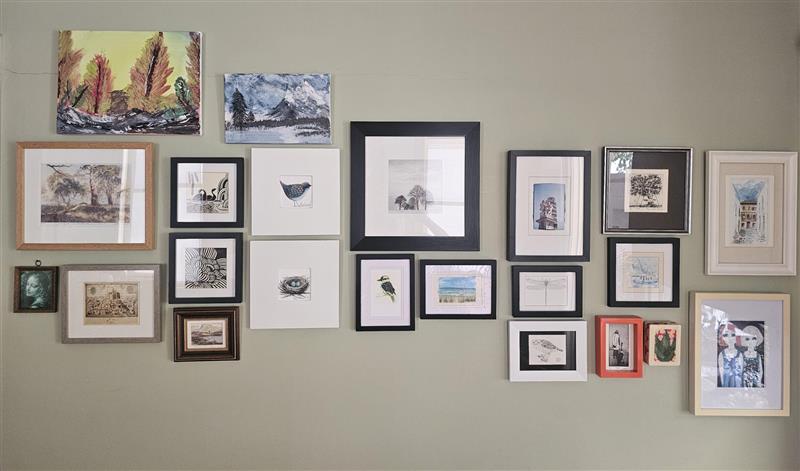
- Sizes – you can choose all one size, a mix of two or three different sizes or a combination of many different sizes. Again, choose what you like most. I personally prefer a mix of all different sizes. Just like in an art gallery!
- What – you may want artwork or photos only. You may only want only black and white or all in colour. You may want just images from your travels. Remember that old, new, sentimental and collected pieces can all sit together. In my Amsterdam apartment I had a gallery wall of only family and friends that didn’t live in the same city as me.
A gallery wall should feel personal — like a story of your life, not a showroom display.
Step 2: Lay everything out on the floor
This is the most important step.
- Lay all your artwork on the floor in front of the wall
- Move pieces around freely to determine which may be the leading piece.
- Try different combinations to see how it will all fit together.
Seeing everything together as a whole collection helps you understand scale, balance and flow before anything is permanent.
Step 3: Choose a lead piece
Select one artwork to anchor the gallery.
- Often this is the largest piece
- Or the most meaningful
- Or the one that visually feels strongest
Everything else will sit around this piece.
Step 4: Play with the layout
This is where you experiment.
- Adjust spacing between pieces
- Swap artworks around
- Try a different lead piece if it’s not flowing
I often test two or three layouts on the floor before settling on one.
Step 5: Hang the lead piece first
Once you’re happy with the floor layout, move to the wall.
- Hang the lead artwork first
- This becomes your reference point for everything else
Step 6: Measure correctly (and simply)
For each artwork, you only need two measurements:
- The centre point of the artwork
- The distance from the top of the frame to where the hook will sit.
On the wall:
- Mark the centre point
- Measure down to the hook position
- Place your nail or hook
This method avoids endless holes and re-hanging.
Step 7: Build out from the centre
Work one piece at a time.
- Measure each artwork individually
- Hang from the centre outward
- Check spacing and balance as you go
This keeps the arrangement calm and intentional.
Step 8: Allow the wall to evolve
A gallery wall is never truly finished.
- Add new artwork over time
- Extend upwards or sideways as your collection grows
In my own home, one gallery wall features my children’s artwork — and it continues to grow as new pieces are framed.
A gallery wall isn’t about perfection. It’s about creating something meaningful that lives and evolves with you — exactly what a Forever Home™ should do.